How to Install Ubuntu to a Usb Drive
In this tutorial you will discover how to install Ubuntu to a usb drive. Did you ever want to run a different operating system on your computer but don’t want to get rid of the current one? Or maybe the computer that you are using has lots of restrictions, to solve this you can use something called a Live USB.
- How to download Ubuntu
- How to install Ubuntu to a usb key using Unetbootin
- How to boot Ubuntu from the usb key
- Tips & Warnings
Downloading Ubuntu
- Head over to http://www.ubuntu.com/download/desktop to download Ubuntu (a distribution of Linux). Click on “Get Ubuntu 12.10”.
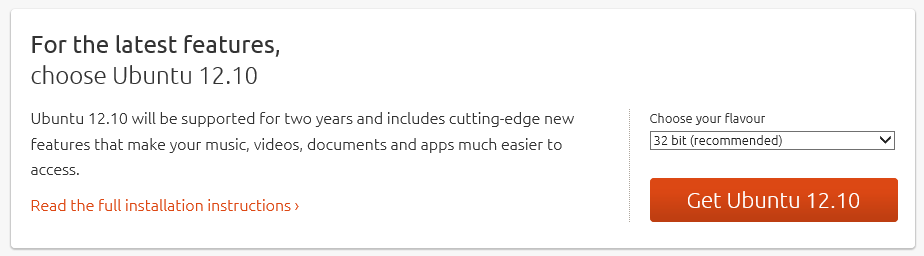
- You may have a donation page come up, scroll to the bottom of the page and click on “not now take me to the download”.

- The download should automatically start if not click “download now”. Save the download to a suitable location, we will need the file later.
Installing Ubuntu
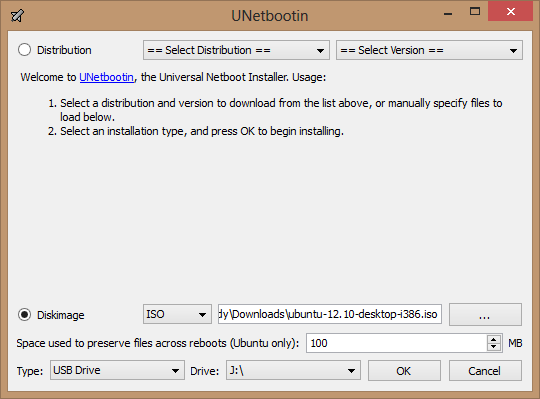
- Head over to http://unetbootin.sourceforge.net/ click on the download for Windows button, you will be redirected to a page where the download will automatically start, if it does not click on “direct link”.

- Save the download to a suitable location and then run the .exe once the download has complete.

- Select “disk image” radio box, select the file that you downloaded in step 3. Plug your usb key in, select the drive letter of the usb key in Unetbootin. Then depending on how much space that you have on your usb key increase the value for “space used to preserve files across reboots” and press ok. This setting is used to determine how space is on your usb so that files are kept.
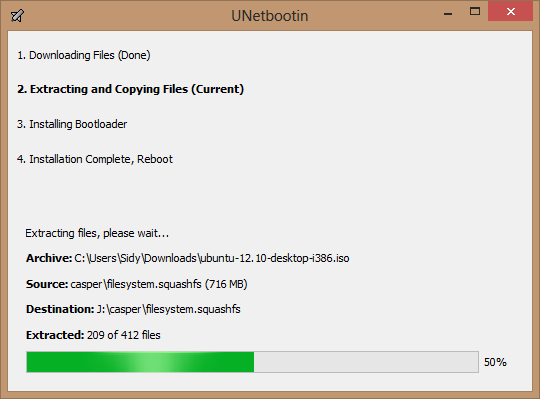
- The window will change and display the installation status do not close the window.
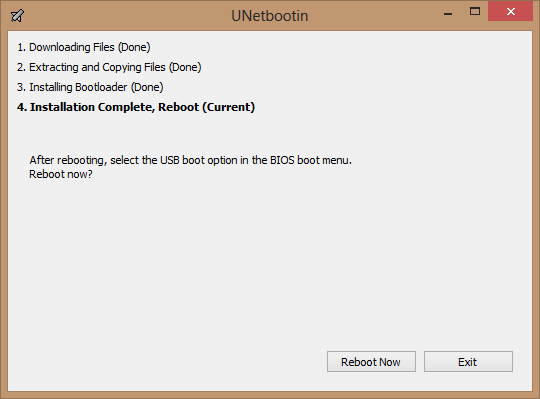
- Once the wizard is complete you will get a prompt to restart your computer click it, make sure your usb key is still plugged in.
Booting Ubuntu
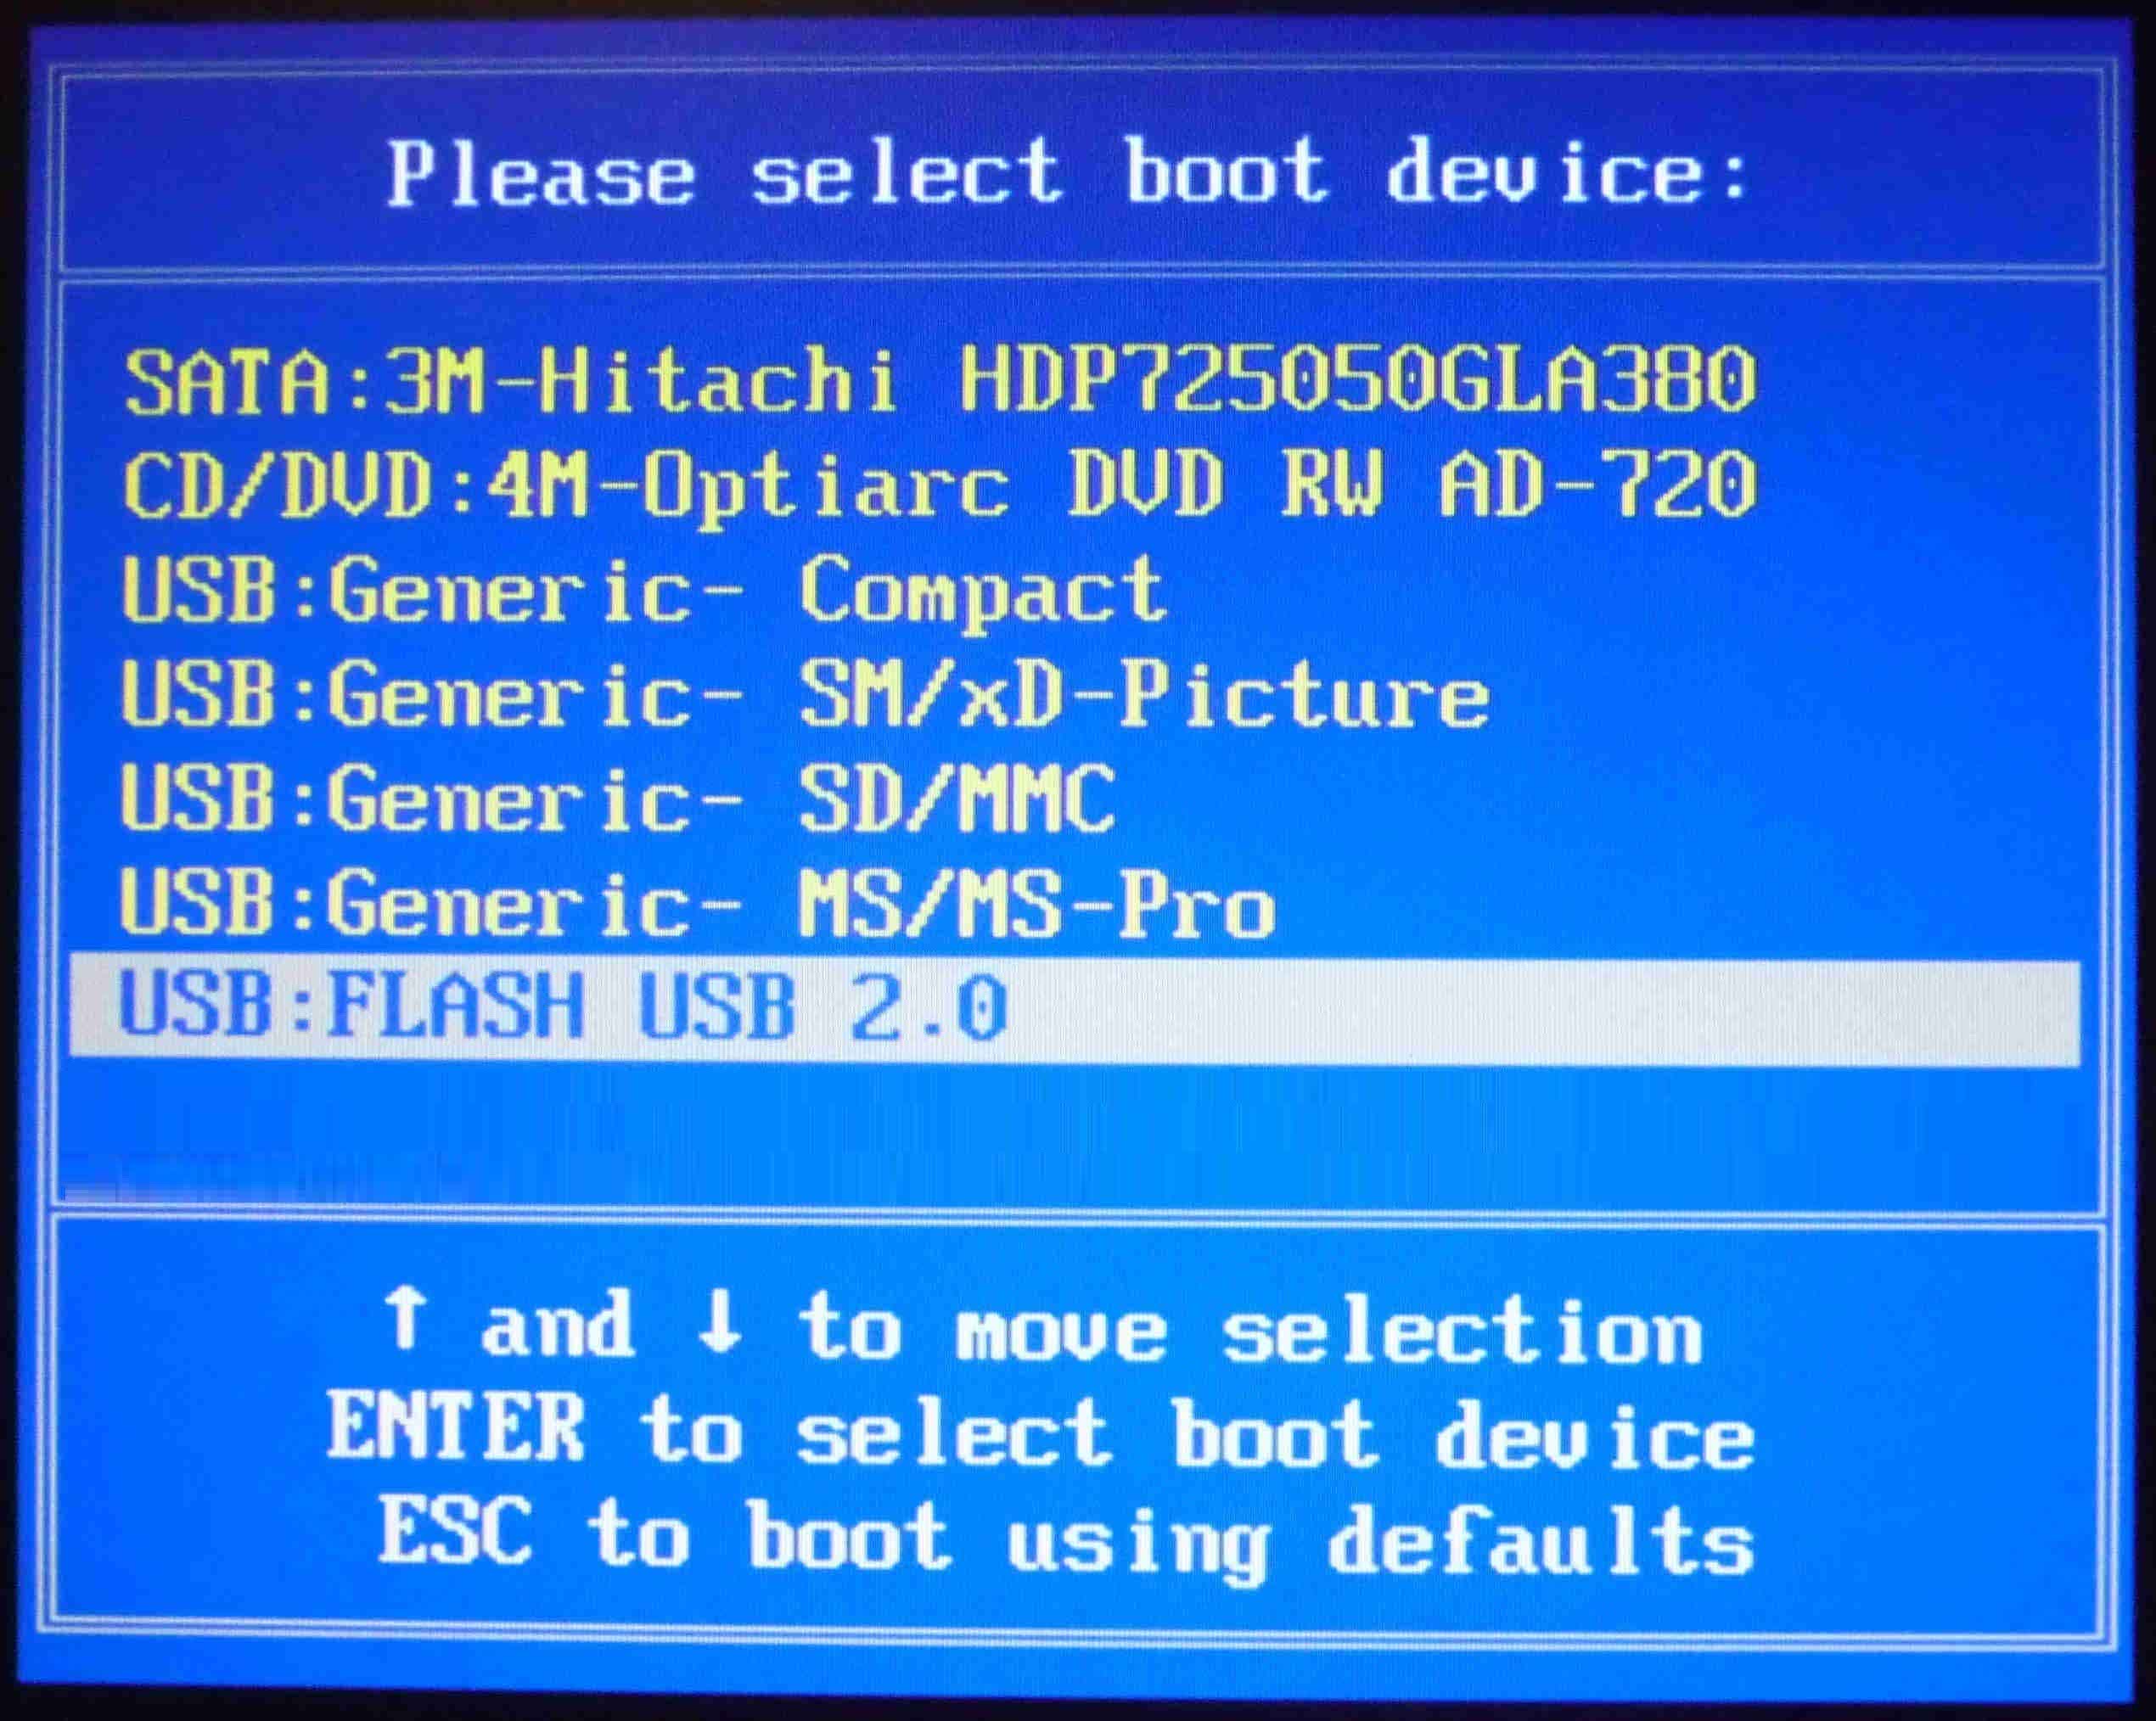
- When your pc restarts you should see a splash screen for a split second, this splash screen displays a key to access the BIOS settings or to select a boot device, click the key that is displayed to select a boot device, in my case it was F12.

- Using the arrow keys navigate to the usb key and click on enter.
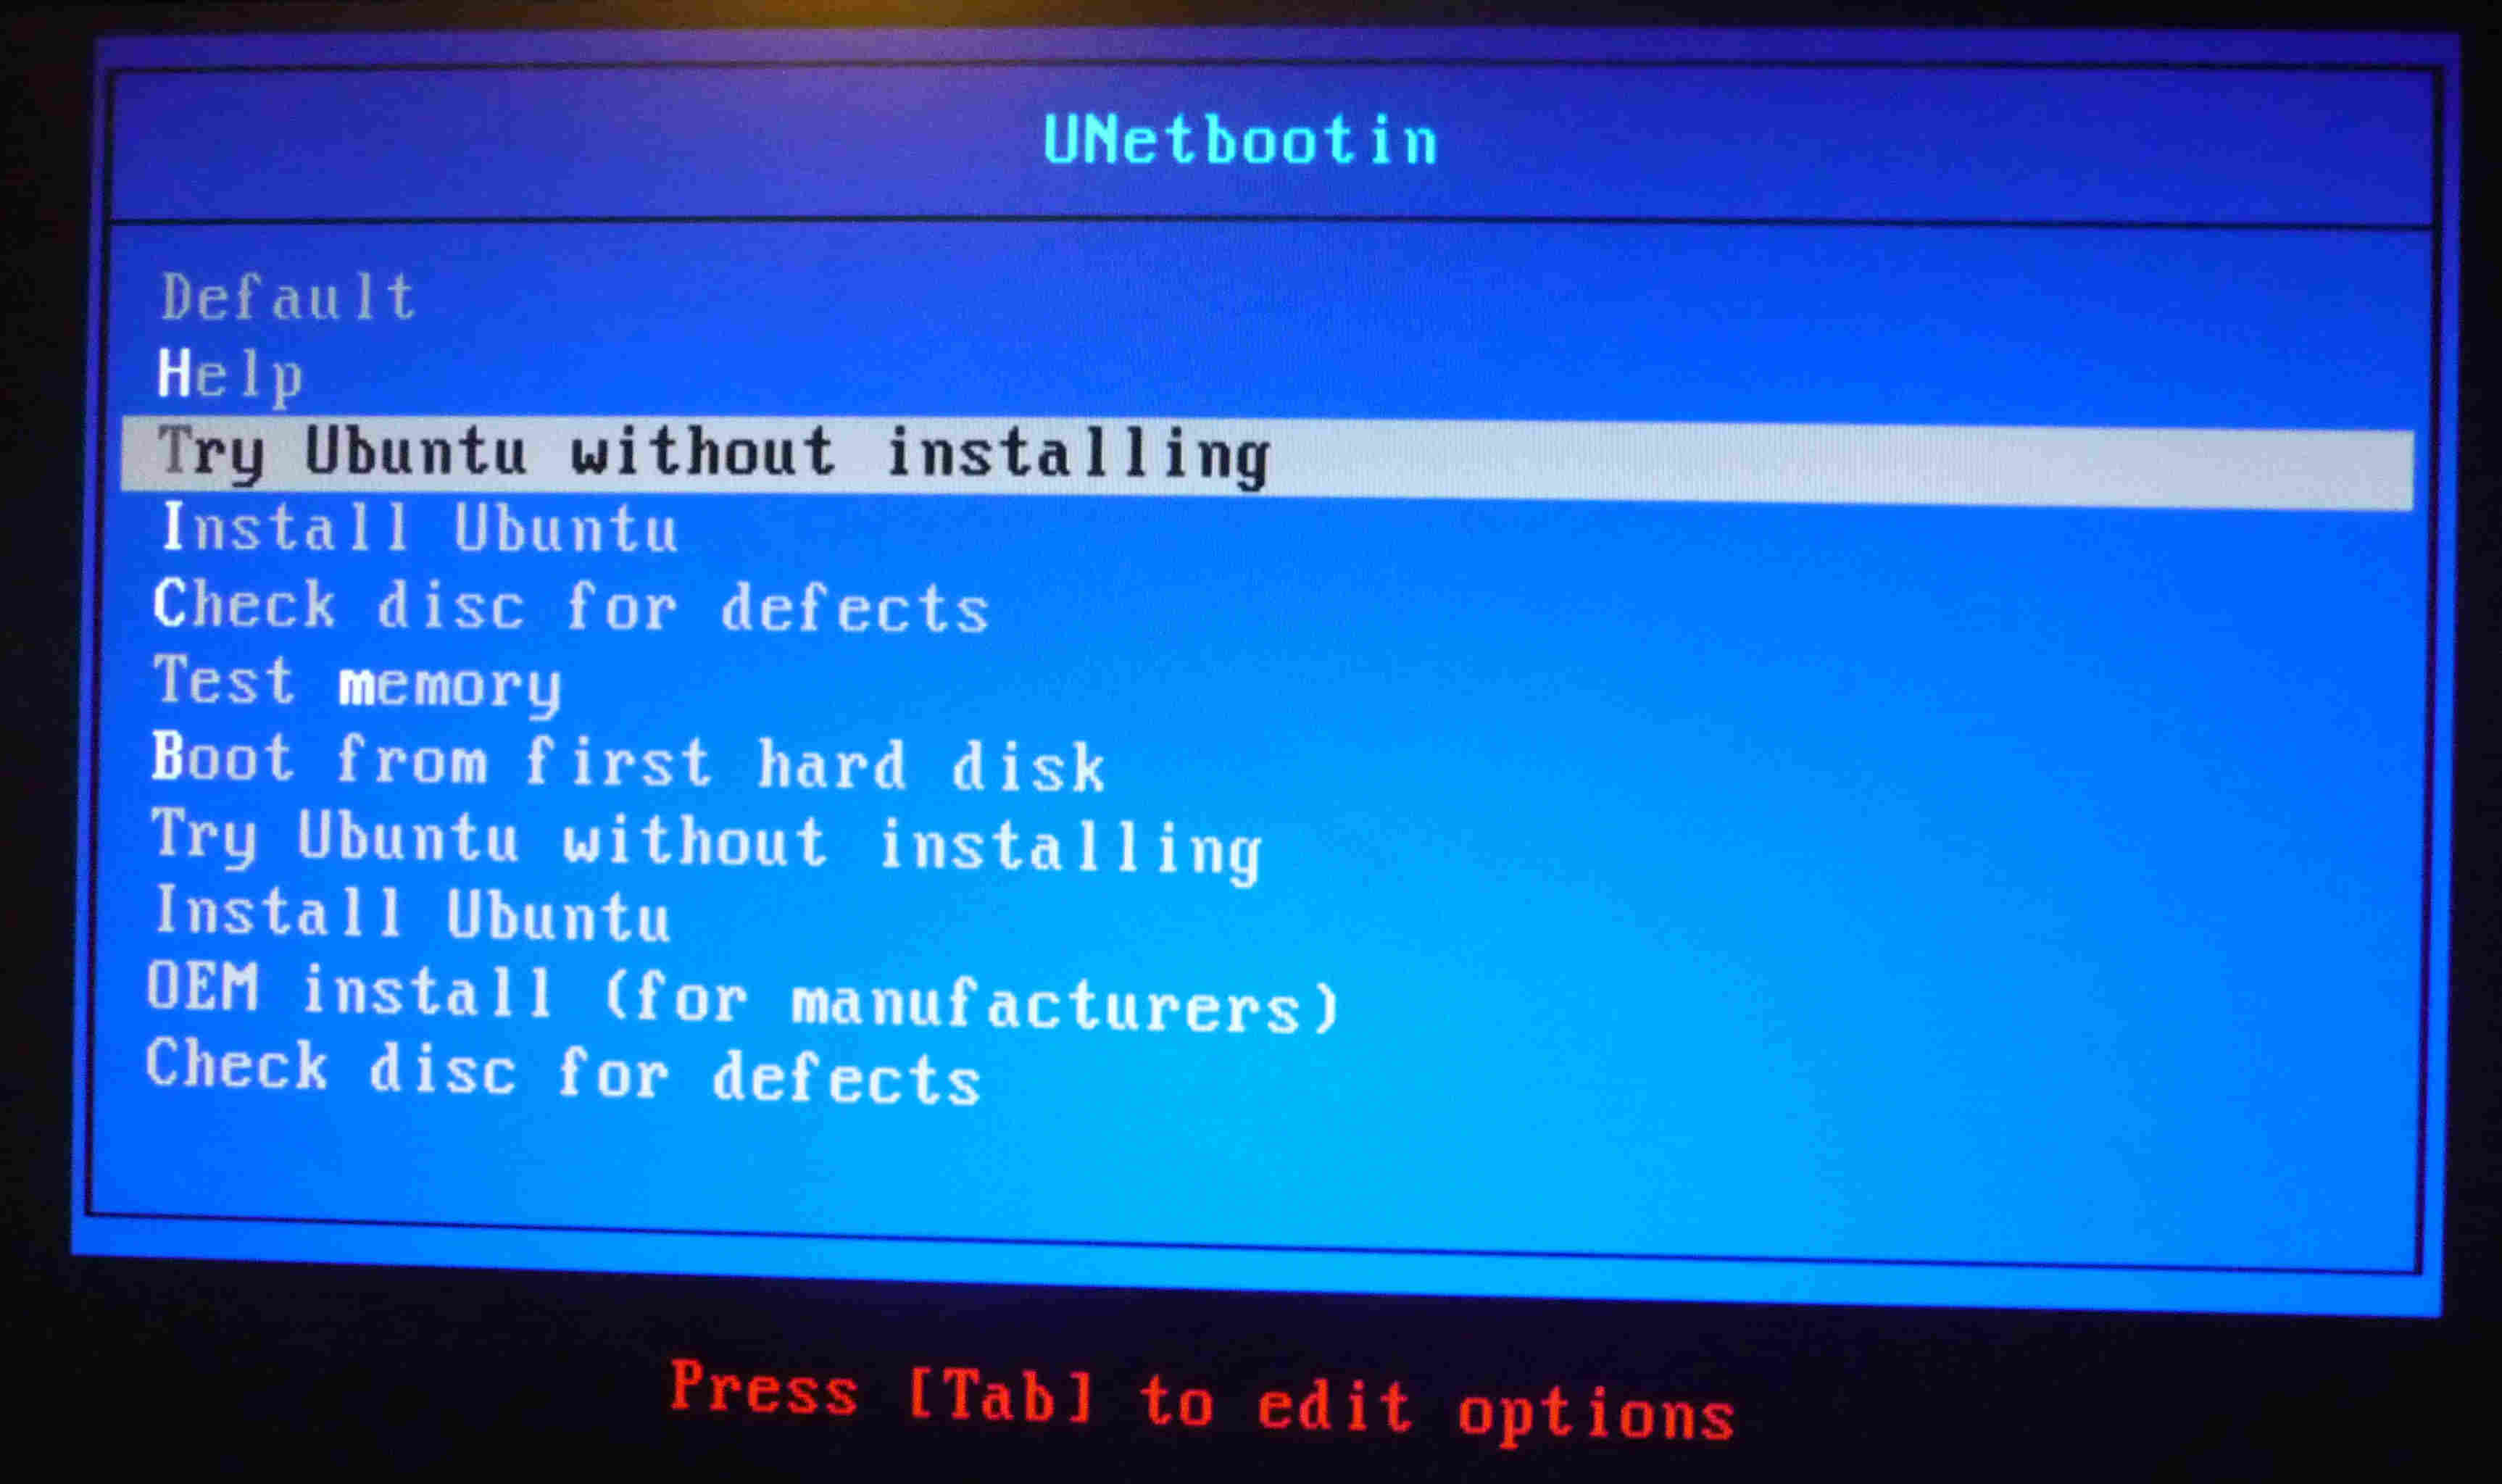
- Using the arrow keys navigate to “Try Ubuntu without installing” and click enter.
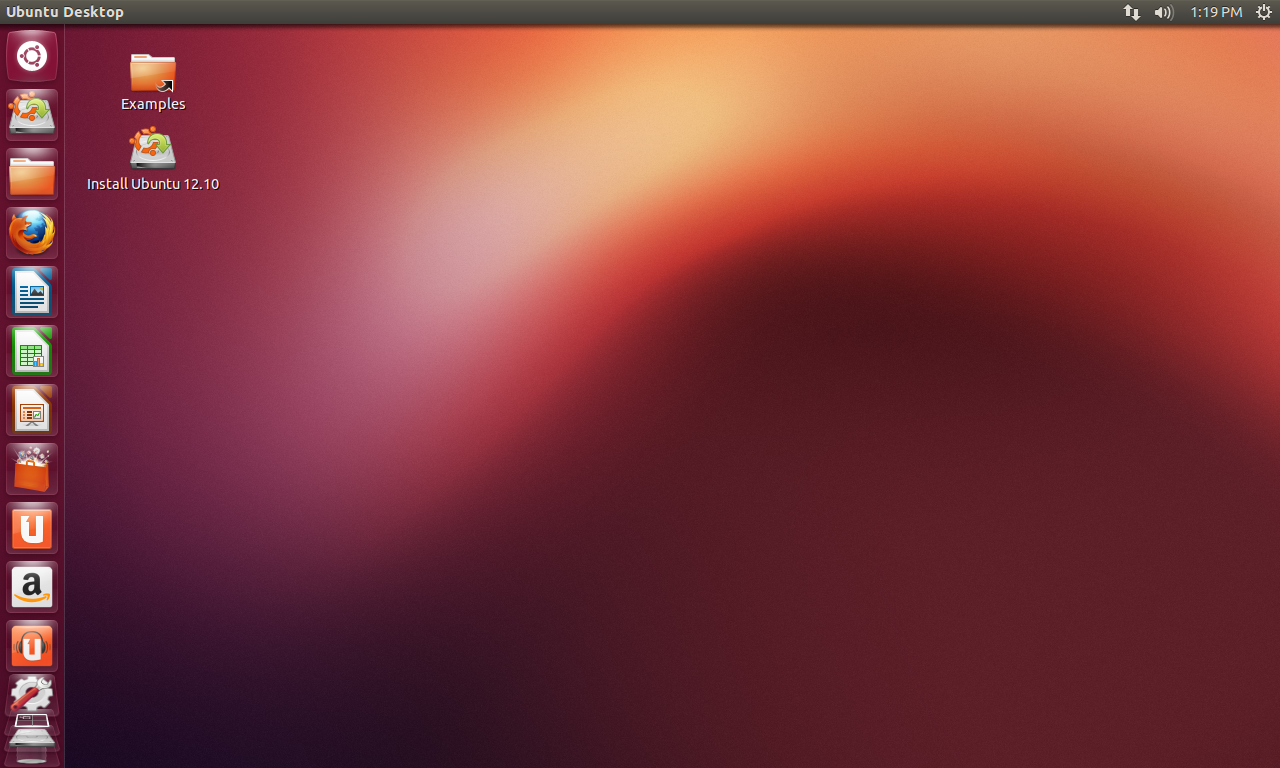
- There should be a loading screen, once it is done loading you should see the Ubuntu desktop.
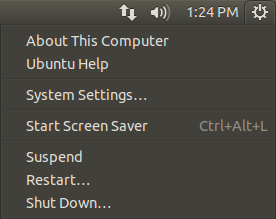
- To shutdown or restart your computer go to the top right corner and click on the gear icon then choose shutdown or restart.
Tips and Warnings
- You can change the time in Ubuntu by clicking on the current time in the top right corner.
- Some steps in this tutorial may be slightly different as new version of Ubuntu are released.
- All the files on your usb will be deleted when you install Ubuntu.
- Do not delete Windows system files in Ubuntu or your computer may not boot into Windows.
Hope you enjoyed this tutorial on how to install Ubuntu to a usb drive. :-) Need some help?
Post it in the comments below.